Defining the sessions
On this page
Initial setup
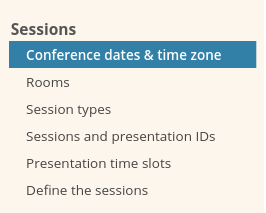
- Input the predefined dataThese data are grouped under Agenda & proceedings / Sessions (fig. 1).
- Conference dates & time zone
- Rooms (can be ignored if the event is virtual)
- Sessions and presentation IDs - On this page, you can define a template that will be used to generate short, unique identifiers for the sessions, for instance "Wed-KEY", "Friday-Posters". These identifiers are needed to identify the sessions in the Q&A of the virtual platform. Otherwise, they are optional. If they are used, the presentations in the sessions will be identified sequentially, as such: "Friday-Posters-01", "Friday-Posters-02", "Friday-Posters-03".
- Presentations time slots - On this page, you can define the duration of various types of presentations (key notes, oral, posters etc). These values are needed to calculate the start and end times of the presentations. They are not needed for the definition of the sessions and can be left for later.
- Select the fields to display and edit
- The list of sessions is displayed and edited at Agenda & proceedings / Sessions / Define the sessions.
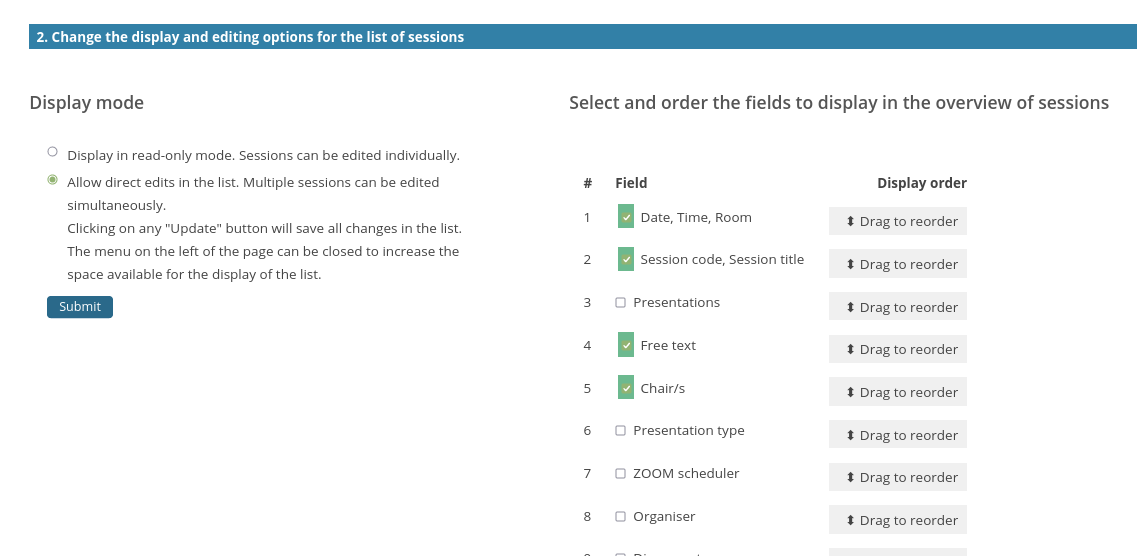
- On that page, under the list Agenda & proceedings / Sessions / Define the sessions / 2. Change the display and editing options for the list of sessions, you can adapt the display to fit your needs, as shown in fig. 2.
- The form, on the left hand side (fig. 2), allows you to toggle between display mode and edit mode. In edit mode, you can input data directly in the list. In display mode, you need to edit each session separately, by clicking on the "Edit..." link, on the left of the session row.
- The form on the right hand side (fig. 2), allows you to select the fields to include into the list of sessions. These could correspond to the fields you need to edit at a certain time and can be changed without affecting their availability for inclusion in the agenda. Their order can also be rearranged on that form.
- The form, on the left hand side (fig. 2), allows you to toggle between display mode and edit mode. In edit mode, you can input data directly in the list. In display mode, you need to edit each session separately, by clicking on the "Edit" button, on the left of the session row.
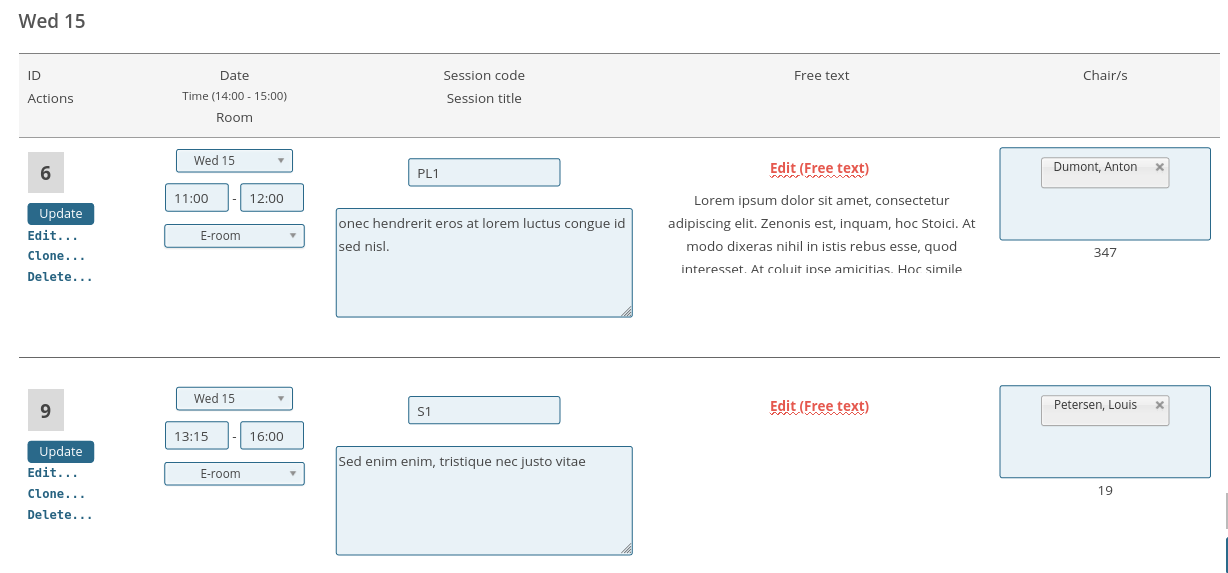
- Fig. 3 shows the list of sessions corresponding to the settings of fig. 2.


Create a session
- To create a session, go to 1. Create / edit the list of sessions, at the top of the page.
- select the type of session you wish to create by clicking on the relevant button (Fig. 4). It will be created and displayed under the buttons.
- Note: the first button, labelled
Add a session with contributionsis suitable for sessions that will list contributions entered on the site by the presenters. The second button is suitable for sessions that do not feature any existing contributions (abstracts). The content of such sessions can be created by inputting free texts in an editor. - Once the session has been created and the right fields have been selected for editing, simply fill in the relevant fields and save the session. This can be done by clicking on the
Updatebutton on the left. A second update button, labelledUpdate all changesand situated in the bottom right corner of the screen, can be used to update multiple sessions at once (Fig. 5).


Create / update the agenda
- Use the button labelled
Save or update the agendato create or recreate the agenda. - The sessions, as defined on this page, will be listed as an overview of sessions for each conference day.
- The next page details the insertion of the speakers and their presentations into the sessions.