Document uploads
On this page
Up to three upload buttons can be activated, allowing participants to upload various documents.
Find and activate the relevant functions
- Locate the setup page
- Go to Configuration / Upload buttons and access one of the three menus in that section. Each leads to the setup of an upload button.
- Activate the button
- Activate the button, at 1. Activate the form and related functions, at the top of the page. This is necessary in order to switch on related functions, which would not appear otherwise. Activating an upload button does not necessarily enable its usage by participants.
- Control access to the upload tab
- Go to 2. Form access and make sure access is not enabled while you are configuring the upload function.
Name the tab, add a heading, add instructions
Go to 3. Texts.
- Name the button
- Input a name for the upload button, for instance
Student card. This name will be used to label the tab used to access the button. It will also be used in other functions, for instance on the exports page. - Page heading
- Input a heading for the page.
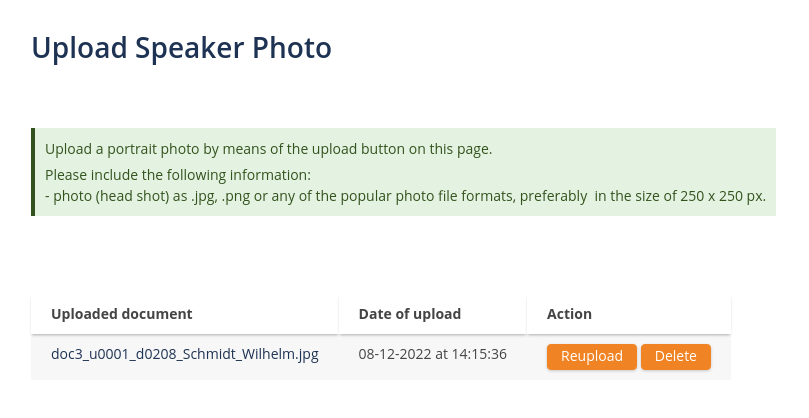
- Instructions
- Input instructions. These will appear below the heading and above the button
Control the type and size of the uploads
Go to 4. File upload options.
- Set the allowed file extensions
- Specify a comma separated list of allowed file extensions (e.g.
doc, docxorpdf). - Leave the box empty to allow all types.
- Specify a comma separated list of allowed file extensions (e.g.
- Set a size limit on the files
- The given limit applies to a single file, not to the total.
- If no limit is given, the limit set by the system will apply (about 50 MB). Please bear in mind that slow connections are likely to time out on large files.
Allow users to access the upload button
Go to Configuration / Access rights / Access to functions & deadlines and find the section relating to the upload button.
- Allow access
- Activate access at Allow access to the page that contains the upload button.
- Set dates of availability
- Set a suitable start and end dates for the period of availability.
Manage and download the files
Once the files start coming in, you might want to inspect or retrieve them.
- View, annotate and flag the files
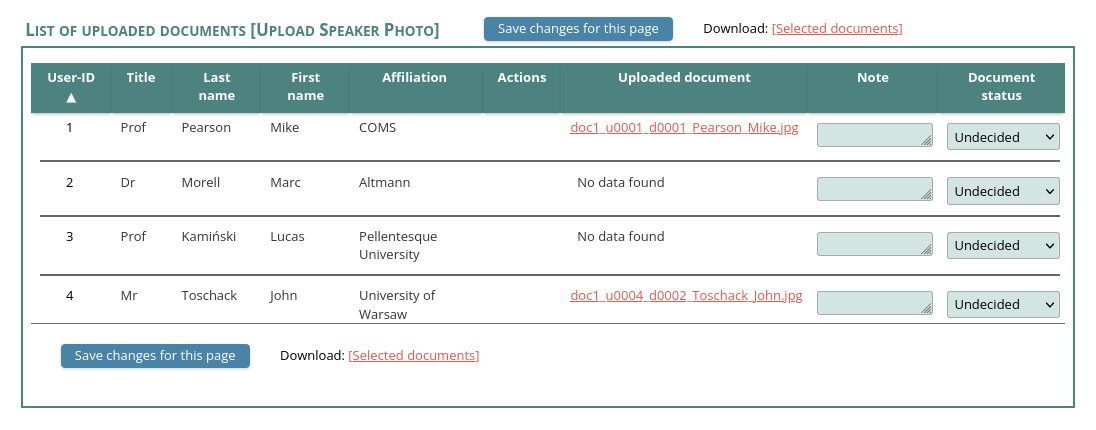
- Go to Participants / Uploaded documents / [Name of the upload button] to work on the uploads.
- You will be able to select files to work on, with the help of a filter, found at 1. Select the records to work on.
- You can view, annotate and set an acceptance status on each file in the section labelled 2. Work on the selected records.
- Download all or selected files
- On that same page, in the section labelled 2. Work on the selected records, at the top of the list of uploaded files, you will find a download link labelled
Download: [Selected documents]. - Clicking on this link will retrieve a zip file containing all the documents selected by the filter at the top of the page.
- To retrieve all files, be sure to clear the filter. You can save the zip on your computer and unzip it to get the individual files.
- On that same page, in the section labelled 2. Work on the selected records, at the top of the list of uploaded files, you will find a download link labelled
- Note
- When a user uploads a file, it is renamed by the software.
- The names of the downloaded files will all follow a determined scheme that contains the user-ID, the document-ID and the name of the user. Example:
doc1_u0010_d0005_Sorel_Guillaume.jpg.