During the event: managing the platform
Managing breakout rooms
This section details the steps organisers need to take in order to allow presenters and attendees to effectively use the breakout rooms. While the breakout rooms can be created ahead of the event, the options needed to allow presenters to upload their posters and to allow participants to freely move between rooms, can only be implemented after starting the meeting, using controls available in the Zoom window. The required steps are described below.
- Step 1 - Presenters' access
Ahead of the session, contact the presenters and let them know that they should be ready to upload / share their presentation before the meeting. This means that they should be able to access the breakout rooms before the scheduled time and understand the upload procedure. To access the Zoom meeting, they will need to log in to their COMS account, access the platform and find the Zoom link in the agenda. An admin needs to start the session to allow them access. Steps 3 and 4, below, will also need to be ready before they access the meeting. - Step 2 - Start the meeting
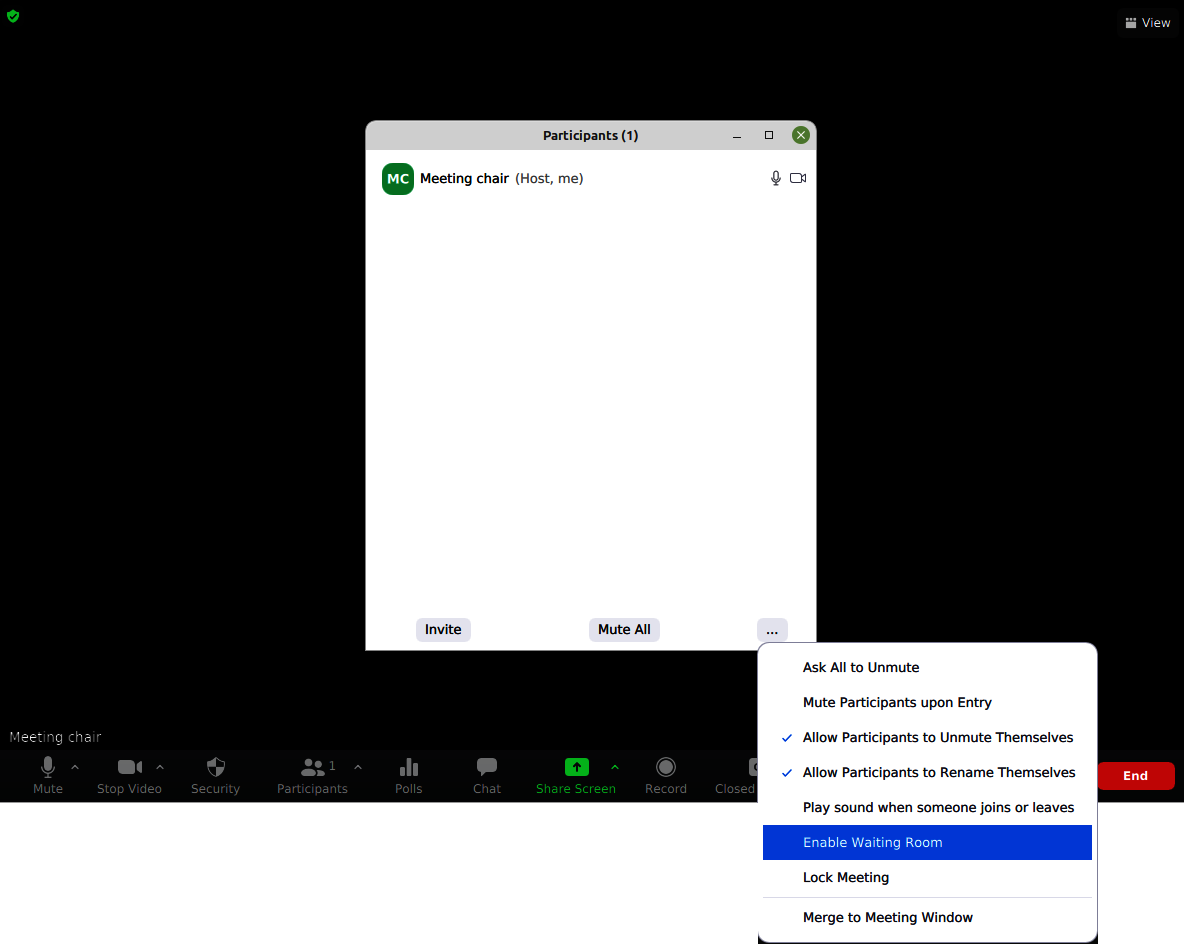
Start the meeting, well before its scheduled time, by means of astart link ⧉, then perform steps 3 and 4, before letting the presenters in. Since Zoom meetings can last up to 30 hours once started, feel free to start a couple of hours in advance, so that speakers have enough time to prepare their room. If you want to prevent access by attendees during the preparation phase, you can enable the waiting room function (fig. 1). Once the meeting is set to start, you can disable the waiting room and let all visitors in. - Step 3 - Allow speakers to share their presentations
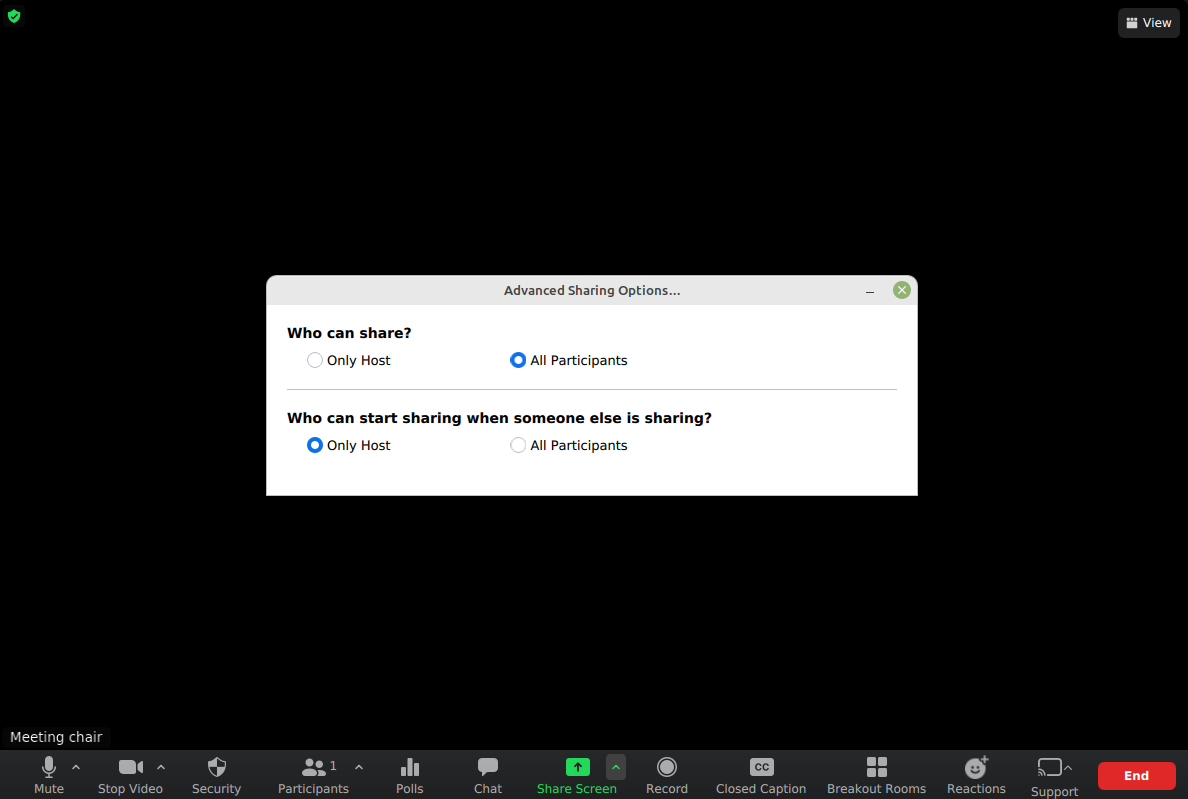
After starting the meeting and entering the session, find the"Share screen"button in the toolbar, at the bottom of the screen and access the settings linked to that function (fig. 2), by clicking on the arrow next to the button. Allow all participants to share, so that the presenters can upload their posters, slides or videos inside their allocated rooms. - Step 4 - Allow free movement during the session
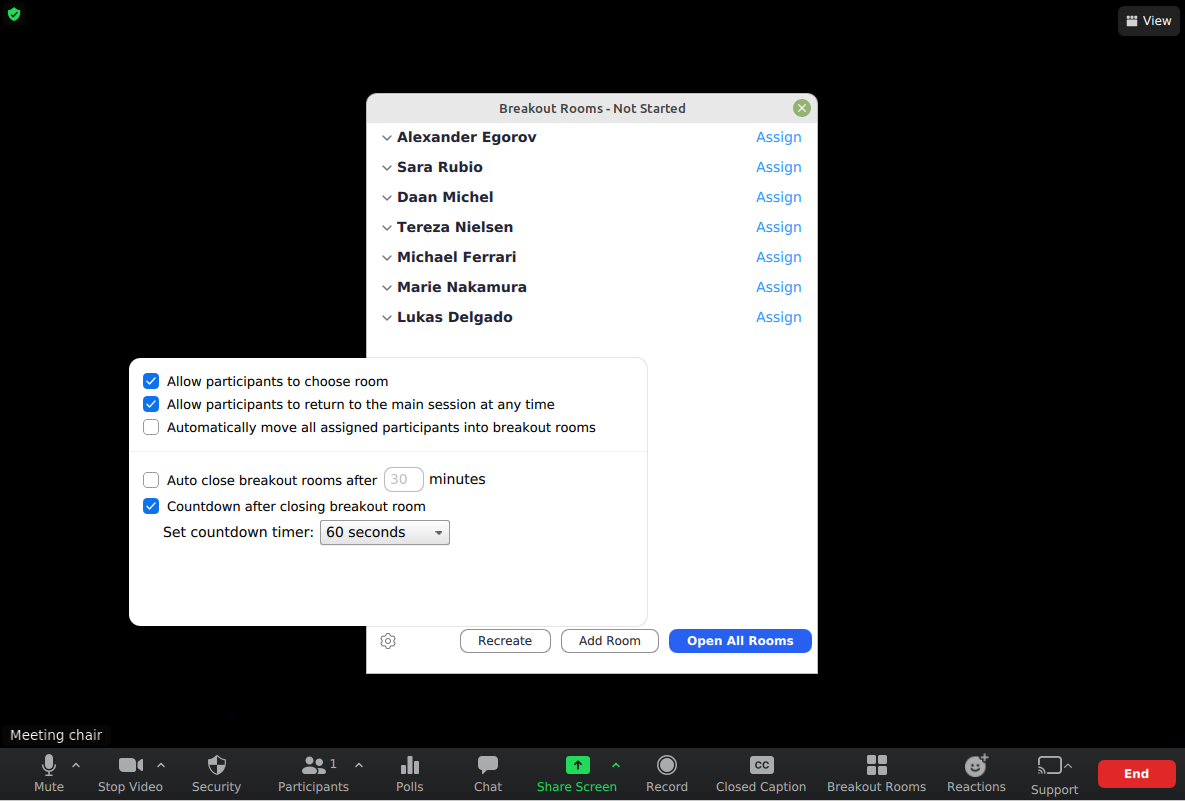
For this, find the"Breakout rooms"button in the bottom toolbar (fig. 3), click on it and look for the settings button, which looks like a cogwheel, in the bottom left corner of the popup screen. Select"Allow participants to choose room", then click on"Open all rooms". - Step 5 - Invite the presenters to access their rooms and upload their presentations
The presenters should be present on the platform ahead of the session. After accessing the meeting, they will simply need to use the"Share screen"function in their allocated room in order to upload their presentation. - Step 6 - Allow all participants to access the meeting
Although participants will see the scheduled time of the session in the agenda, it might be useful to post an announcement in one of the streams of the platform chat, for instance the one labelled News and Updates. Be sure to disable the waiting room setting for free access.