First steps
On this page
The conference descriptors, basic email parameters and languages should be set at the start of the configuration, as they are important, yet easy to overlook.
Input the conference descriptors
- Go to Configuration / General functions / Conference descriptors.
- Input the conference title, venue, dates and website.
- There are placeholders for these data which can be inserted in texts and emails, for instance
{conference-dates}. - In the case of recurrent or multiple events that use the same configuration, placeholders allow organisers to reuse texts and emails from a previous or existing site without edits, by simply updating the conference descriptors.
Display useful information on users' accounts
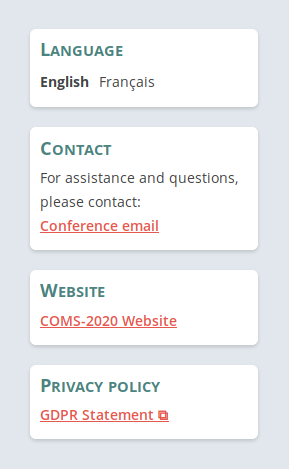
- The column on the right hand side of a COMS website features cards displaying useful data for the users. This column is seen both before and after login.
- Fig 1. shows an example of the right hand column, with the following cards:
- Language
- This card only appears if you activate more than one language on the site. It allows users to choose their preferred language. The system remembers the selected language for each user. You can activate or deactivate languages at Configuration / General functions / Language settings.
- Contact
- This card displays a link to the conference email address. It is only shown if an email address is provided at Configuration / General functions / Conference descriptors.
- Website
- This card displays a link to the conference website. It is only shown if the URL of the website is provided at Configuration / General functions / Conference descriptors.
- Privacy policy
- This card displays a link to your GDPR privacy declaration. It is only shown if you decide to publish it. The next section describes the function that allows editing and publishing of the declaration.
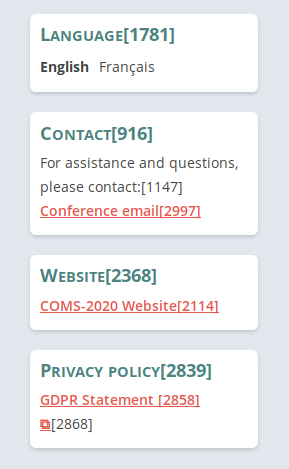
- If you need to modify the texts and headings that accompany the data shown on the cards, you can use the text-IDs shown in Fig 2. The page at Texts & translations / Identify and edit any text explains how to retrieve and edit these texts.
Publish a GDPR privacy statement
- Go to Configuration / General functions / GDPR Statement.
- You will find a ready-made statement that can be used as is, or can be edited to fit your needs, in the section labelled
3. Sample Privacy Statement. - If you decide to use it as is, you will need to provide the name of your institution, which will be inserted in the text. This can be done in the section labelled
2. Display the Privacy Statement on the login page. - Once the text is ready, you can activate its display on the site.
- It will appear as a link that leads to the prepared text, in the right column of all the pages seen by the users. It will also be seen in the right column, before login.
Insert a banner
 Basic knowledge of HTML/CSS is required.
- Go to Configuration / General functions / Banner.
- The top part of the site can be personalised with texts and pictures which can be uploaded to the site before being used.
- Templates for typical types of banners are provided (e.g. pure picture banner, logos on the sides and text in the middle).
Change the colour scheme
- Basic knowledge of HTML/CSS is required.
- Go to Configuration / General functions / Styling.
- You can modify the colour scheme of the site to match the banner or the conference website.
Select the languages of the site
- Go to Configuration / General functions / Languages.
- You can activate up to three languages.
- COMS maintains texts in English, German and French.
- It is possible to replace the default languages with others, or add another language.
- A translation module is provided to manage texts in all languages.
- The texts can be edited in all languages.
- Users can select their preferred language which will be remembered by the system. This is only relevant for sites that use more than one language.
Settings in the email module
- Go to Emails / Overview and settings.
- Set the sender of the emails ( important) - When users receive an email and reply, their email will be sent to this address.
- Set a global signature (optional) - You can set a signature to use in all emails. If you add the placeholder
{signature}to the text of the emails, this placeholder will be replaced by the recorded signature. - Receive copies of emails (optional) - You can input a list of email addresses that will receive copies of all the automatic emails generated by the system, to monitor activity.
Check access permissions
- Go to Configuration / Access rights / Access to functions & deadlines.
- Set the time zone.
- Review the permissions listed on that page. They determine whether users can access the various functions available to them (account creation form, submission form, payments etc).
- Note that you can control the permissions in three ways: you can deactivate a permission completely, you can make it available between two dates, or you can make it available without time restrictions. Time restrictions can be made to coincide with deadlines and are enforced automatically. For example, you can set a deadline for abstract submission on a given day at midnight. The deadline will be enforced at midnight in the time zone indicated at the top of the page.
- Throughout the life time of the site, it will be important to ensure that the permissions are set correctly. Many of them change with time. For example, you might decide to allocate reviews and invite reviewers to work on their assignments once the reviews have all been allocated. During the allocation process, you might want to bar access to the reviews. Before you email the reviewers and invite them to start reviewing, you might want to check that the reviews are accessible.